
Getting in shape for Belize, Part 2
This is a continuation of my “Part One” post Getting in shape for Belize, Part 1. If you didn’t have a chance to read Getting in shape for Belize, Part 1 click on the link and it will take you to the blog post. If this test is successful I move to phase three and the last test to complete. OK, now that I am done with this part of the house clean, I will move on.
It has taken me a few weeks to get moving on the second part of the of the leak test and functionality. As I mentioned in my previous post I leaked tested the housing without my camera in the Ikelite Housing. So this time, I am leak testing the housing with the camera installed, and strobes attached.
Oh boy, this makes me a little nervous. I have now increased the percentage of failures and malfunctions. Even though I had successful leak test, doesn’t mean that I could have missed something when assembling my underwater kit this time. Stuff just happens, even the slightest hair, or grain of sand can compromise a seal and whoosh! a flood happens.
When assembling my underwater kit, I become very methodical. I use a mental checklist when assembling my gear. First, I visually inspect all of my gear. I even inspect the parts that are critical to failure i.e. the tray, handles and strobe arms. Those parts are not mission critical, but still should be inspected, especially if they have been in sand or dirt. Dirt or sand can be in a place not visible and could accidentally fall on a seal during the final assembly. It’s like my own version of a clean room., not really, but that is how I am thinking.
Second, I start to assemble all the major components. Some of this might already be assembled if I had just previously used it on a dive. However, I am giving you an example as if I was assembling the pieces, parts right after getting to my travel destination. I start with \attaching the handles to the tray, and tray to the housing. Now I move to the strobe arms, usually two sets if the camera is set up for wide angle photography. These will need to be assembles if taken apart for travel. Once that is done I inspect the seals and o-rings on both flash heads and strobe cable connections.
Now this next little step can be done either way, connecting the strobe cables to the flash heads (Strobes) or, what I prefer to do is connect the strobe to the strobe arms first. Then I attach the strobes arms and strobes to the camera housing tray and handles assembly. This step should be easy. Once I have that done I conned the strobe cable to the strobe bulk head connection on the housing itself. Double check all the connections, and we are ready for the last two steps in assembly.
Here are the last two steps in the assembly process. At this point I almost have a full assembled underwater kit. Now without the port installed I flip the housing and all our parts attached onto it’s face. I now have a better access to back of the rear of the housing. This will be where the camera is installed. The cmaera is attached to the tray that is mounted permanently to the back-plate. I Check the back-plate o-ring. Making sure this is free of any debris and also inspect the seat that the o-ring rests on. Once those are checked and o-ring is re-installed we are now ready to button up the camera and back of the housing.
OK, now the final step. I Flip the housing back over onto its back, remove the dust cap for the housing. Remove the dust cap on the camera. Install the gear ring on to the lens if you are using a zoom lens or plan on manually focusing the camera. Then attache the lens to the camera. Now, place or install the opposite gear ring for the housing. Once the lens and gear rings are installed and attach, inspect the o-ring on the lens port. Just like the back plate on the housing, make sure the o-ring, and o-ring seat are free of debris. Once that is done, I now attach the lens port to the housing, and make sure all latches are secure.
Turn the camera and strobes on, check all my camera control knobs, buttons and levers. Test fire to make sure the strobes are working. Check the camera displays and settings. If everything is 5×5, A-OK then I am ready to go.
If I encounter any issues at this point, no harm no foul. I just need to identify the issue and correct the offending problem. It’s easier to do this on the boat or side of the pool then in the water. I have missed a few dives, because my camera had a last minute malfunction. All because I didn’t pre-check the camera or strobe functionality before jumping in the water. Sometimes the image is black… that is when I check to see if I removed the lens cap! Yep!, I have done that.
I have now done all the above, and I am ready to do a quick dunk test in the pool or dunk tank to make sure everything is sealed. Once checked, into the pool I go.
So far everything worked well. Strobes fired underwater, camera function checked out fine. I could see the display clearly underwater to check settings. I could manipulate all the knobs, levers and buttons. I could see an issue if you were trying to work some of the harder to reach buttons if I was wearing a thick pair of SCUBA gloves.
Things that I noticed. One issue was that the underwater kit was negatively buoyant. I would like to see the kit a bit more neutral buoyant, this would be easier to control when setting up a shot. This can be adjusted by adding some floats to the strobe arms. Also, to go with the negative buoyancy is that the kit wants to roll onto the 8″ dome port. I don’t like having to constantly fight this while underwater. I have never used a dome port this large, and I figured with the extra air volume that it would be more prone to roll on it’s back. Even though that would be just as annoying, at least it wouldn’t scratch my port.
My next item that noticed, it the Ikelite strobe arms and ball clamps, are at best mediocre. The tray, handles, arms themselves are heavy. The ball clamps don’t tighten enough to keep the arms from sliding out of position when out of the water and gravity takes over. What I found that I am doing is cranking down extremely hard to lock them in place above water. However, if I need to move the arms underwater, I don’t have enough leverage to loosen up the ball clamps to change the position of the strobes.
I have already started to research an new tray and arm system for my housing and strobes. One of the company’s I am looking at is BtS, or Beneath the Surface. They have a great tray and arm system with lots of versatility. One feature I really like is the “Bridge Bar”. The Bridge Bar goes over the top of the housing and give you a handle to carry the kit in an upright position. The Bridge Bar also allows the boat crew a place to grab the U/W Kit and hoist it onto the boat. This new system will shave pounds off my current U/W kit. This lighter tray/arm system will help with the buoyancy issue too.
One last item, is that somewhere in the testing and manipulation of the camera settings I must have pushed a button that stuck. This stuck button disabled other button functions of the camera except allowing me to take pictures and focus the camera. However, I was not able to review the images after they were taken and or delete images. I couldn’t go into the onscreen menu. Once I pulled the camera out of the housing, all functions worked correctly. I will have to investigate that a little more so I don’t have that issue again.
In conclusion, I am very happy with my kit. It needs a few tweaks here and there, but that is par for the course. I can’t wait to take it out into the open water and take some real world photos.
Below area few images that I took while on the second pool test. Hopefully my next test will be in open water…
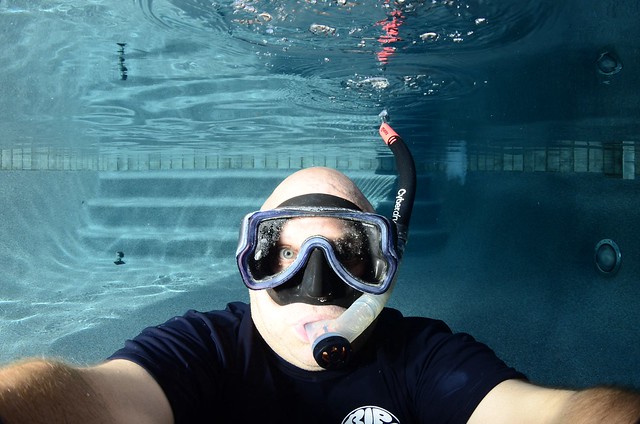
Underwater Selfie…
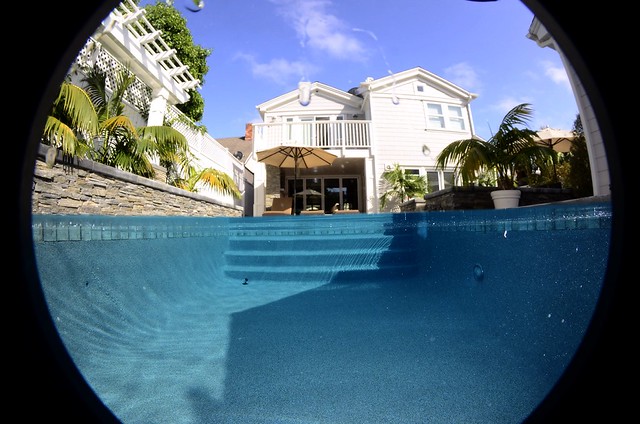
Over/Under or 50/50, this was taken with my Tokina 10-17mm Fisheye. The vignetting is cause from the extension attached to the 8″ dome port. I need a small extension in order for this to be eliminated. New ext. has been ordered.
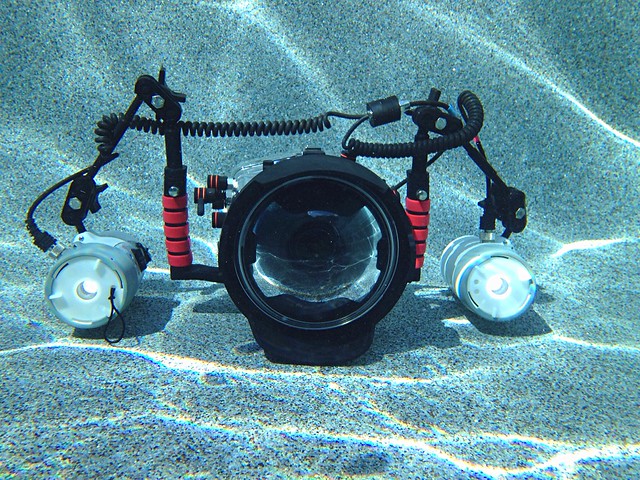
This is the complete U/W Kit with everything installed and attached.


Pingback: Getting in shape for Belize, Part 1 | The Pixel Hoarder